kakts-log

programming について調べたことを整理していきます

Go revelでのmongoDBとのコネクション、CRUD処理についてのメモ

概要

Go revelというwebフレームワークで個人のwebアプリを作っている最中にハマった箇所のメモ。

mgoというGoのmongoドライバを使って、mongoDBとのコネクションを保持させ、CRUD処理を1ファイルにまとめて 他のcontroller層から呼び出して使いたかったので その方法をまとめました。 今回、mongoに関しては、特にレプリカセットを組まずに、単一のmongodに対してアクセスさせます。

アプリのファイル構成

revelを使ったアプリのファイル構成は以下のとおりです。 ファイル構成はrevel new app コマンドで自動生成されたままで、特に変えていないです。

app
├── controllers
│   ├── app.go
│   └── session.go
├── init.go
├── models
│   └── user.go
├── routes
│   └── routes.go
├── tmp
│   └── main.go
└── views
    ├── App
    │   ├── Index.html
    │   ├── Test.html
    │   └── register.html
    ├── debug.html
    ├── errors
    │   ├── 404.html
    │   └── 500.html
    ├── flash.html
    ├── footer.html
    └── header.html

今回はapp/controllers/session.goに、mongoDBとのコネクションやCRUDのロジックをまとめます。

goでのmongoDBへのクライアントとしては、mgoというパッケージが一番主流なのでそれを使う。
https://godoc.org/gopkg.in/mgo.v2 mongoのドキュメントサーチのクエリ生成において、mgoにバンドルされているbsonパッケージが使われているので、こちらも利用する https://godoc.org/gopkg.in/mgo.v2/bson

session.goは、ざっと書いてみると以下のような感じになる。
mongodへ接続したときのsession情報を保持しており、毎回 insert search removeなど、mongodへアクセスする際に sessionを確認する。 sessionがない場合は新たにmgo.Dial(dialURL)を呼ぶことでコネクションを貼る。

基本だと思うが、mongodへのアクセスを行う際に毎回コネクションを貼るのは、明らかに良くないし、もともと推奨されていない。
ローカルとかで軽く勉強するときには問題ないが、コネクションを貼るコストが高いので実環境では絶対やってはいけない。

mongoDB側で許容されているコネクションプールの設定は、mongod側の設定で色々変えることができますが、本稿では省きます。

package controllers

import (
    "gopkg.in/mgo.v2"
    "gopkg.in/mgo.v2/bson"
)

var (
    session *mgo.Session
    err error
)

// dialURL to mongodb instance
const dialURL = "mongodb://192.168.33.10"

// Create new session.
// if session has already exists, reuse it.
func cloneSession(dialURL string) *mgo.Session {
    if session == nil {
        session, err = mgo.Dial(dialURL)
        if err != nil {
            panic(err)
        }
    }
    return session.Clone()
}

// Insert document to specified db.
func InsertEntity(dbName string,
    collection string,
    model interface{}) {

    // Get DB session
    session := cloneSession(dialURL)
    defer session.Close()

    err := session.DB(dbName).C(collection).Insert(model)
    if err != nil {
        panic(err)
    }
}

// Remove document from collection
func RemoveEntry(dbName string,
    collection string,
    model interface{}) {

    session := cloneSession(dialURL)
    defer session.Close()

    err := session.DB(dbName).C(collection).Remove(model)
    if err != nil {
        panic(err)
    }
}

func queryCollection(dbName string,
    collection string,
    query func(c *mgo.Collection) error) error {

    session := cloneSession(dialURL)
    defer session.Close()

    c := session.DB(dbName).C(collection)
    return query(c)
}

func findOne(userId string,
    dbName string,
    collection string,
    ) (results []interface{}, errorCode string) {
    query := bson.M{"userid": userId}
    return Search(query, 0, 1, dbName, collection)
}

func Search(q interface{},
    skip int,
    limit int,
    dbName string,
    collection string,
) (results []interface{}, errorCode string) {

    errorCode = ""
    query := func(c *mgo.Collection) error {
        fn := c.Find(q).Skip(skip).Limit(limit).All(&results)
        if limit < 0 {
            fn = c.Find(q).Skip(skip).All(&results)
        }
        return fn
    }

    search := func() error {
        return queryCollection(dbName, collection, query)
    }

    err := search()
    if err != nil {
        errorCode = "error"
    }
    return
}

まとめ

今回 mongoDBへの接続や 、CRUD処理をすべてsession.goにまとめて、 revelアプリ内でのcontroller層からsession.goを呼び出す形にした。
session生成とCRUDはおそらく別ファイルに分けた方が良いかと思うので、改良の余地がある

Vagrant VM内にたてたmongodにhost OSから接続できるようにする

概要

Vagrant VM内でmongodを立てて、host OSからアクセスできるようにする方法をまとめます。 docker containerで以前mongo用コンテナの建て方についてまとめたのですが、 仕事でVagrantVMを立て、その中でmongodを立てる機会があり、
今回はその時に行った手順をまとめます。

vagrant 1.8.1
MongoDB server version: 3.4.7

やりたいこと

Vagrant で立ち上げたVM内に、mongoDB 3.4系 (本稿では3.4.7 )のmongodプロセスを立ち上げる。 VMのプライベートネットワーク内のipを192.168.33.10と設定し、host(MacOS)のポート27017を、VM内のmongodが使用しているポート27017にポートフォワーディングさせる。

hostのmongoシェルから mongo --host 192.168.33.10とコマンドを打つと、VM内のmongodにアクセスできるようにする

Vagrant VMを立ち上げる

下準備として、centOS用のboxを追加する作業がありますが、今回は主旨とずれるため説明しません。 centOSのboxは、下記のところから、6系か7系のものを選んで vagrant box add {url} とすればboxが追加されるかと思います A list of base boxes for Vagrant - Vagrantbox.es

Vagrantfileの記述

そして、Vagrantで起動するVMの設定ファイルであるVagrantfileに、プライベートネットワークのipや、ポートフォワーディング設定を記述していきます。 今回はすでに用意したcentOSのboxを使用します。 box名はここではcentosとしています。

$ vagrant box list
centos (virtualbox, 0)

今回はVagrantfileの記述はほんとにシンプルで、最小限の設定にします。 プライベートネットワークIPと、ポートフォワーディングの設定のみ行います。 hostの27017ポートをguest(VM)の27017ポートに紐付けます

Vagrant.configure(2) do |config|
  config.vm.box = "centos"

  # VMのプライベートネットワークのIPを設定する
  config.vm.network "private_network", ip: "192.168.33.10" 
  # ポートフォワーディングの設定をする
  config.vm.network "forwarded_port", host: 27017, guest: 27017
end

上記のconfig.vmのパラメータは色々あり、ここでVMの設定を行うことができます。
設定できるパラメータはドキュメントを参照ください。 www.vagrantup.com

今回つかう config.vm.networkの設定はこちらです www.vagrantup.com

vmを立ち上げる

Vagrantfileの記述ができたのでvmを立ち上げます。

Vagrantfileのある階層でvagrant upを実行してください

Vagrantfileの内容をもとにVMを立ち上げる
$vagrant up


Vagrant VMでポートフォワーディングされているポートを確認
$ vagrant port
The forwarded ports for the machine are listed below. Please note that
these values may differ from values configured in the Vagrantfile if the
provider supports automatic port collision detection and resolution.

    22 (guest) => 2222 (host)
 27017 (guest) => 27017 (host)

vagrant up して立ち上げ、 vagrant portで紐付けられたポートを確認できます。

これでVMが立ち上がりました。 あとはvagrant ssh してVMインスタンス内で作業します。

centOS内でのmongo3.4系のインストールとmongod起動

今回はmongoのインストールは主旨と外れるのでここでは詳細な手順をスキップします。 本家のドキュメントに書いてある通りにおこなってyum でインストールできるようになります。 Install MongoDB on Red Hat Enterprise or CentOS Linux — MongoDB Manual

mongodの起動設定の編集

mongo3.4系がインストールできたらmongodを起動する前に、VM外からmongodへアクセスさせるための設定を入れます。 centOSでmongoDBをインストールした際、デフォルトで/etc/mongod.conf にmongodの設定ファイルが作成されます。
ここで、mongodへの接続を待ち受けるipの設定を行う事ができます。

net.bindIp項目でその設定を行う必要があり、初期設定では下記の用になっています。

# network interfaces
net:
  port: 27017
  bindIp: 127.0.0.1  # Listen to local interface only, comment to listen on all interfaces.

mongod起動時のportは 27017、接続を待ち受けるipは127.0.0.1つまりVM内部のみからとなっております。

bindIpのドキュメントを抜粋すると下記のとおりです。

The IP address that mongos or mongod binds to in order to listen for connections from applications. You may attach mongos or mongod to any interface. When attaching mongos or mongod to a publicly accessible interface, ensure that you have implemented proper authentication and firewall restrictions to protect the integrity of your database.

To bind to multiple IP addresses, enter a list of comma separated values. https://docs.mongodb.com/manual/reference/configuration-options/#net-options

今回は、VMに設定したプライベートネットワークのIP 192.168.33.10 に対して接続も受け付けるため、 bindIpにカンマ区切りで192.168.33.10を追記します。

# network interfaces
net:
  port: 27017
  bindIp: 127.0.0.1,192.168.33.10  # カンマ区切りで192.168.33.10追加

これでmongodの設定はできたので、mongodを起動します。

#mongod start
$sudo service mongod start
Redirecting to /bin/systemctl stop  mongod.service

# mongodのプロセスが立っていることを確認する
$ps aux | grep mongo
mongod    3451  7.6  8.1 972640 38172 ?        Sl   15:57   0:00 /usr/bin/mongod -f /etc/mongod.conf

これでmongodを起動できました。

vm内のファイアウォールの設定を変更する

現時点では、まだVM外部から27017ポートへの接続はできません。 ファイアウォールの設定を変更し、VM内の27017ポートに対して、VM外からtcpでアクセスできるようにします。

firewall-cmdを使うのが非常に簡単なので、今回はfirewall-cmdを使った方法を説明します。

## port27017に対して、tcpを使った外部からの接続を許可する
sudo firewall-cmd --zone=public --add-port=27017/tcp --permanent

## ↑で設定を変更したのでfirewall-cmdをリロードする
sudo firewall-cmd --reload

これで27017ポートの外部公開設定が完了しました。

ホストOSからVM内のmongodに接続する

VM、mongodの設定が完了したのであとはホストOSのターミナルから接続するだけです。

$ mongo --host 192.168.33.10
MongoDB shell version v3.4.4
connecting to: mongodb://192.168.33.10:27017/
MongoDB server version: 3.4.7
Server has startup warnings: 
2017-09-06T16:04:00.953+0000 I CONTROL  [initandlisten] 
2017-09-06T16:04:00.953+0000 I CONTROL  [initandlisten] ** WARNING: Access control is not enabled for the database.
2017-09-06T16:04:00.953+0000 I CONTROL  [initandlisten] **          Read and write access to data and configuration is unrestricted.
2017-09-06T16:04:00.953+0000 I CONTROL  [initandlisten] 
2017-09-06T16:04:00.953+0000 I CONTROL  [initandlisten] ** WARNING: /sys/kernel/mm/transparent_hugepage/enabled is 'always'.
2017-09-06T16:04:00.953+0000 I CONTROL  [initandlisten] **        We suggest setting it to 'never'
2017-09-06T16:04:00.953+0000 I CONTROL  [initandlisten] 
> show dbs
admin  0.000GB
local  0.000GB

これで接続できない場合は、mongodの設定ファイルを確認し、mongod再起動したり、あとはfirewall-cmdでポートの公開設定がされているかを確認してください。 firewallまわりで手こずるかもしれませんが、一度理解するとあとは簡単に設定できるかと思います。

まとめ

今回はVagrant で立ち上げたcentOS VM内のmongodを、ホストOS(MacOS) から接続できるようにしました。 コレができるとVagrantで簡単に検証用のmongo環境が作れて、mongo関連の検証・動作確認が捗るかと思います。

redis 4系から追加されたUNLINKについて

はじめに

2017年7月にリリースされたredis4.0から、特定のキーの値を非同期的に削除するUNLINKコマンドがでました。 UNLINKコマンドの既存のDELコマンドとの違いついてまとめます。

redis4.0系リリース

2017年7月にredis4.0系がリリースされました。 主な機能に関しては、下記のqiitaの記事にまとめられています。 qiita.com

redis4.0.0のリリースノートは下記のリンクで見ることができます。 https://raw.githubusercontent.com/antirez/redis/4.0/00-RELEASENOTES

若干読みづらいですが、 UNLINKに関する記述を抜粋します。

Lazy freeing of keys. Redis is now able to delete keys in the background in a different thread without blocking the server. The new UNLINK command is the same as DEL but working in a non blocking way.

UNLINKコマンドが生まれた経緯 シングルスレッドモデルにおける DELコマンドの問題点

redisはシングルスレッドモデルのため、既存のDELコマンドの場合だと 複数のクライアントからクエリを実行された時、1つのキューに並んで順番に処理されます。
そのため、データサイズの大きいデータセットに対してDELを実行すると、計算量が大きいため、後続の処理が遅れて大きなパフォーマンス低下の要因となってしまいます。

今回4.0系で登場したUNLINKは、ある値を削除する際にこの問題を解決するコマンドです。
UNLINKを使ったクエリが実行された際、文字通り、指定されたキーの値を即座に削除せず、非同期的にデータセット内のキーを格納したキースペースからUNLINKされ、実際のデータは後に削除されます。 これにより、ノンブロッキングな処理が可能となります。

クエリの実行的には即座に完了し、データセットのサイズに関係なく定数時間 O(1)で処理が完了します。

同時に複数のキーを指定した場合は キーの数N 文の時間の計算量O(N)となります。

UNLINKの内部処理を見る

UNLINKコマンドの内部処理が気になったので、githubに上がっているredisのソースを読んでみました。 関連のソースは、 src/lazyfree.cあたりにまとまっています。

UNLINKが実行されたときに、dbAsyncDeleteと呼ばれる関数が呼ばれます。 https://github.com/antirez/redis/blob/unstable/src/lazyfree.c#L49-L85 文字通り、データを非同期的に削除する処理を行っています。

/* Delete a key, value, and associated expiration entry if any, from the DB.
 * If there are enough allocations to free the value object may be put into
 * a lazy free list instead of being freed synchronously. The lazy free list
 * will be reclaimed in a different bio.c thread. */
#define LAZYFREE_THRESHOLD 64
int dbAsyncDelete(redisDb *db, robj *key) {
    /* Deleting an entry from the expires dict will not free the sds of
     * the key, because it is shared with the main dictionary. */
    if (dictSize(db->expires) > 0) dictDelete(db->expires,key->ptr);

    /* If the value is composed of a few allocations, to free in a lazy way
     * is actually just slower... So under a certain limit we just free
     * the object synchronously. */
    dictEntry *de = dictUnlink(db->dict,key->ptr);
    if (de) {
        robj *val = dictGetVal(de);
        size_t free_effort = lazyfreeGetFreeEffort(val);

        /* If releasing the object is too much work, let's put it into the
         * lazy free list. */
        if (free_effort > LAZYFREE_THRESHOLD) {
            atomicIncr(lazyfree_objects,1);
            bioCreateBackgroundJob(BIO_LAZY_FREE,val,NULL,NULL);
            dictSetVal(db->dict,de,NULL);
        }
    }

    /* Release the key-val pair, or just the key if we set the val
     * field to NULL in order to lazy free it later. */
    if (de) {
        dictFreeUnlinkedEntry(db->dict,de);
        if (server.cluster_enabled) slotToKeyDel(key);
        return 1;
    } else {
        return 0;
    }
}

さらに内部を辿っていくと、 src/dict.cの方で dictGenericDeleteと呼ばれるstatic関数を呼び出しています。
これは、データセット内の特定のキーへのリンクを解除しています。
https://github.com/antirez/redis/blob/06263485d46696ba76a653d2b594f3493103c001/src/dict.c#L361-L399

/* Search and remove an element. This is an helper function for
 * dictDelete() and dictUnlink(), please check the top comment
 * of those functions. */
static dictEntry *dictGenericDelete(dict *d, const void *key, int nofree) {
    unsigned int h, idx;
    dictEntry *he, *prevHe;
    int table;

    if (d->ht[0].used == 0 && d->ht[1].used == 0) return NULL;

    if (dictIsRehashing(d)) _dictRehashStep(d);
    h = dictHashKey(d, key);

    for (table = 0; table <= 1; table++) {
        idx = h & d->ht[table].sizemask;
        he = d->ht[table].table[idx];
        prevHe = NULL;
        while(he) {
            if (key==he->key || dictCompareKeys(d, key, he->key)) {
                /* Unlink the element from the list */
                if (prevHe)
                    prevHe->next = he->next;
                else
                    d->ht[table].table[idx] = he->next;
                if (!nofree) {
                    dictFreeKey(d, he);
                    dictFreeVal(d, he);
                    zfree(he);
                }
                d->ht[table].used--;
                return he;
            }
            prevHe = he;
            he = he->next;
        }
        if (!dictIsRehashing(d)) break;
    }
    return NULL; /* not found */
}

更に細かくは見れていないですが、 データセットは内部的にlinked listのようなデータ構造でリストを保持していて、 dictGenericDelete内では、対象のキーへの参照を外すことで、UNLINKを行っているようです。
上記のコードをのwhileループ内の処理を抜粋してみると、おぼろげながらも理解ができるかと思います。

        while(he) {
            if (key==he->key || dictCompareKeys(d, key, he->key)) {
                /* Unlink the element from the list */
                if (prevHe)
                    prevHe->next = he->next;
                else
                    d->ht[table].table[idx] = he->next;
                if (!nofree) {
                    dictFreeKey(d, he);
                    dictFreeVal(d, he);
                    zfree(he);
                }
                d->ht[table].used--;
                return he;
            }
            prevHe = he;
            he = he->next;
        }

dictGenerictDeleteの第3引数nofree は2値の値で、1の場合は、直接データを消さずに参照だけ外し、 0の場合は直接データを消す、つまりメモリをfreeしているようです。

static dictEntry *dictGenericDelete(dict *d, const void *key, int nofree) {

実際には下記の用な感じで呼び出されています。

nofree == 0 つまりメモリをfreeさせる場合
/* Remove an element, returning DICT_OK on success or DICT_ERR if the
 * element was not found. */
int dictDelete(dict *ht, const void *key) {
    return dictGenericDelete(ht,key,0) ? DICT_OK : DICT_ERR;
}
nofree == 1 つまり 今回紹介したUNLINKのように参照を外す場合
/* Remove an element from the table, but without actually releasing
 * the key, value and dictionary entry. The dictionary entry is returned
 * if the element was found (and unlinked from the table), and the user
 * should later call `dictFreeUnlinkedEntry()` with it in order to release it.
 * Otherwise if the key is not found, NULL is returned.
 *
 * This function is useful when we want to remove something from the hash
 * table but want to use its value before actually deleting the entry.
 * Without this function the pattern would require two lookups:
 *
 *  entry = dictFind(...);
 *  // Do something with entry
 *  dictDelete(dictionary,entry);
 *
 * Thanks to this function it is possible to avoid this, and use
 * instead:
 *
 * entry = dictUnlink(dictionary,entry);
 * // Do something with entry
 * dictFreeUnlinkedEntry(entry); // <- This does not need to lookup again.
 */
dictEntry *dictUnlink(dict *ht, const void *key) {
    return dictGenericDelete(ht,key,1);
}

という感じになります。 このあたりの実装は読んでいて非常に勉強になるので、redisを使っている方は読んでみることをおすすめします。

まとめ

redis4.0系から、データセット内の特定のキーを非同期で削除できるUNLINKコマンドが追加されました。 UNLINKは、DELとは異なり、実際にクエリが実行されたときにデータを削除せず、あくまでデータセット内からキーの参照を非同期で UNLINKしています。
これにより、シングルスレッドモデルを採用しているredisで、データ容量が大きい場合にDELによって実行速度が遅くなってしまう問題を解消できます。

実際にパフォーマンスについては今回検証できていないですが、redis4.0系以上を使う場合は UNLINKを使うことによって大きくパフォーマンス改善が図れるかと思います。

Golang listパッケージを使ったdoubly linked listの操作

Golang listという標準パッケージを使ってdoubly linked listの操作を簡単に行えるので、まとめます。

list - The Go Programming Language

使い方

listパッケージを使うためには、公式ドキュメントにある通り、"container/list"をインポートします。

list.New()で新たなlistインスタンスを生成する事ができます。

http://golang-jp.org/pkg/container/list/#New

func New() *List

List構造体とListがもつ要素を表すElement構造体は、以下のようなデータ構造となります。

// List represents a doubly linked list.
// The zero value for List is an empty list ready to use.
type List struct {
    root Element // sentinel list element, only &root, root.prev, and root.next are used
    len  int     // current list length excluding (this) sentinel element
}

// Element is an element of a linked list.
type Element struct {
    // Next and previous pointers in the doubly-linked list of elements.
    // To simplify the implementation, internally a list l is implemented
    // as a ring, such that &l.root is both the next element of the last
    // list element (l.Back()) and the previous element of the first list
    // element (l.Front()).
    next, prev *Element

    // The list to which this element belongs.
    list *List

    // The value stored with this element.
    Value interface{}
}

List構造体は、Element型のroot要素を一つもつのと、List自体の長さを表すlenを持ちます。
そしてElement構造体は、要素自身がもつ値Valueと、自分が属するListのポインタ Listと、さらには、自分の要素の前・後に位置する要素のポインタ next, prevを持ちます。

List Element構造体を使って、他の言語でもよく見られる一般的なdoubly linked listの構造をあらわしています。

package main

import (
    "container/list"
    "fmt"
)

func main() {
    // create a new list
    l := list.New()
    l.PushBack(1) // l {1}

    // list mに要素を2つ追加
    m := list.New()
    m.PushBack(2) // m {2}
    m.PushBack(3) // m {2, 3}
    fmt.Printf("Length of m is %d\n", m.Len())

    // lの後ろにmをつなげる
    l.PushBackList(m)

    // Iterate through list and print its contents.
    // 1 2 3と表示される
    for e := l.Front(); e != nil; e = e.Next() {
        fmt.Println(e.Value)
    }

    // l の先頭に要素追加
    l.PushFront(5) // l {5, 1, 2, 3}

    // l の先頭にmの要素をつなげる
    l.PushFrontList(m) // l {2, 3, 5, 1 , 2, 3}

    // Iterate through list and print its contents.
    // 2 3 5 1 2 3 と表示される
    for e := l.Front(); e != nil; e = e.Next() {
        fmt.Println(e.Value)
    }

    // 最後の要素を削除する
    l.Remove(l.Back())
    // Iterate through list and print its contents.
    // 2 3 5 1 2 と表示される
    for e := l.Front(); e != nil; e = e.Next() {
        fmt.Println(e.Value)
    }

}

非常に簡単に使えます。
Goに関しては勉強中で、サードパーティのコレクションライブラリなどもあるかどうかは調べれてないですが、
listパッケージを使って問題なくdoubly linked listを利用できます。

node.js nightlyバージョンで使えるようになった http2モジュールについて

概要

先日 node.jsにおいて http/2の実装がマージされました。
experimentalな機能で、現在だとnode nightlyバージョン(9.x系)で実行時にオプションを付けることで http2 コアモジュールが利用可能です。
近々node.js 8.xに取り込まれるようで年内にはちゃんと使えるようです。
今回は、このhttp2コアモジュールについて簡単な使い方と内部実装について調べたことをまとめます。

ドキュメントはnodeのmasterブランチにマージされており、見ることができます。
- github.com

http2コアモジュールの実装について

http2の実装はnghttp2というCライブラリが採用されております。 このライブラリはhttp/2の実装のなかで人気であり、 RFC7540 HTTP/2 とRFC7541の仕様に基づいて実装されています。
- github.com

http2 コアモジュールのJS apiは下記で定義されています。
- node/http2.js at master · nodejs/node · GitHub

http/2のJS apiの各実装は lib/internal/http2配下のファイルにあります。内部の実装を見たい人はここで見ることができます。
- node/lib/internal/http2 at master · nodejs/node · GitHub

nghttp2ライブラリへのインターフェースはsrc/node_http2.ccと src/node_http2.hで定義されています
nghttp2とコアモジュールのやり取りはこのあたりを見ればよいかと思います。
- node/node_http2_core.cc at master · nodejs/node · GitHub
- node/node_http2.h at master · nodejs/node · GitHub

上記のhttp2コアモジュールを使うにあたり、nodeの実行時に –expose-http2 フラグを追加することで、 require(‘http2’) が使えるようになります。
これは、すでに http2というnpmモジュールが存在しているため、 –expose-http2フラグを付けないと下記のnpmモジュールをrequireするようになり、既存のnpm http2モジュールを使っているプロジェクトは注意が必要です。
- www.npmjs.com

node.js nightly版のインストール

http2のコアモジュールを使うために、node.jsの最も最新のnightly版(現時点で9.x系)を使えるようにします。
mac OSの環境が前提ですが、 node.js nightly版を簡単にインストールできる node-nightlyというnpmモジュールを使います。

node-nightlyモジュールインストール
$npm install --global node-nightly

nightly最新版のnodeインストール
$ node-nightly 
Downloading the nightly version, hang on...
node-nightly is available on your CLI!

nightlyバージョンの確認
$ node-nightly -v
 New nightly available. To upgrade: `node-nightly --upgrade` 
v9.0.0-nightly20170806e96ca62480

これでnode.js nightly版を簡単にインストールすることができました。

http2.createSecureServerを使ってhttp2サーバを作る

ここでさっそくhttp2のTLS/SSLを使ったセキュアなサーバを作ってみます。
http2.createSecureServer()というメソッドで、サーバのインスタンスを作成することができます。

http2.createSecureServer()について

http2.createSecureServer()の内部の実装は、主要なところだけ抜粋すると以下のようになっています。 - https://github.com/nodejs/node/blob/master/lib/internal/http2/core.js#L2427-L2434

function createSecureServer(options, handler) {
  if (typeof options === 'function') {
    handler = options;
    options = Object.create(null);
  }
  debug('creating http2secureserver');
  // Http2SecureServerのインスタンスを返す
  return new Http2SecureServer(options, handler);
}

・・・

// Http2SecureServerクラス
class Http2SecureServer extends TLSServer {
  // コンストラクタ
  constructor(options, requestListener) {
    options = initializeTLSOptions(options);
    super(options, connectionListener);
    this[kOptions] = options;
    this.timeout = kDefaultSocketTimeout;
    this.on('newListener', setupCompat);
    if (typeof requestListener === 'function')
      this.on('request', requestListener);
    this.on('tlsClientError', onErrorSecureServerSession);
    debug('http2secureserver created');
  }

  // setTImeoutメソッド
  setTimeout(msecs, callback) {
    this.timeout = msecs;
    if (callback !== undefined) {
      if (typeof callback !== 'function')
        throw new errors.TypeError('ERR_INVALID_CALLBACK');
      this.on('timeout', callback);
    }
    return this;
  }
}

このメソッドの戻り値として、Http2SecureServerクラスのインスタンスを返します。
Http2SecureServerクラスはTLSServerクラスを継承しており、接続においてSSL/TLSを使う事となります。

TLSServerクラスはtlsというコアモジュールで定義され、実装は下記になります。

tls_wrapでTLSServerクラスの実装が見れます。
[https://github.com/nodejs/node/blob/master/lib/
tls_wrap.js#L784-L893]

かなり階層が深くなりますが、TLS/SSLを使ったセキュアなサーバを作る場合、http2.createSecureServerの引数にオプションを渡すことができ、 接続において使うTLS/SSLの証明書や秘密鍵を設定することができます。 optionとして、オブジェクトのkey, certにそれぞれ指定してあげます。
node/_tls_wrap.js at master · nodejs/node · GitHub

TLS/SSL証明書 秘密鍵の作成

今回はここで証明書と秘密鍵を指定するために、ローカルで自前で準備していきます。
ここではあくまでローカル環境でのhttp2サーバを作ることが目的のため、自前でローカルpcでopensslコマンドを使って作成します。
- stackoverflow.com

mac OSでopensslを使って以下のコマンドを実行することでカレントディレクトリに下記2つのファイルが生成されるので、 サーバインスタンス生成時にこれを指定します。
- server.crt: SSLサーバ証明書 - server.key: SSL公開鍵暗号用の秘密鍵

サーバを立ててみる

さっそく上記の説明を踏まえてhttp2サーバを立ててみます。
ここではあくまでhttp2コアモジュールのサンプルコードをそのまま使用します。

http2サーバインスタンス生成時に 証明書・秘密鍵を指定し、 3000番ポートで待ち受けます。
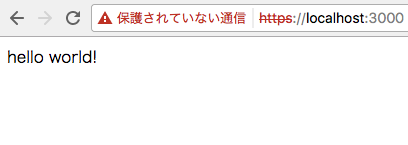
https://localhost:3000をブラウザでアクセスしてhello worldを表示させる簡単なものを作ります。

サーバを立てた後、アクセスがくると サーバインスタンスに対して"stream"イベントが発火されるので、 ハンドラ関数を設定します。
ここではresponse statusと hello worldを記述した簡単なhtmlをstreamで返します。

// http2コアモジュールをrequire
const http2 = require('http2');

// createSecureServerでのオプションを指定する
const options = {
  key: fs.readFileSync('server.crt'), // 公開鍵暗号の秘密鍵
  cert: fs.readFileSync('server.key') // TLS/SSL サーバ証明書
};

// Create a plain-text HTTP/2 server
const server = http2.createSecureServer(options);

// アクセスが来た場合、streamイベントが発火されう
server.on('stream', (stream, headers) => {
  stream.respond({
    'content-type': 'text/html',
    ':status': 200
  });
  stream.end('<h1>Hello World</h1>');
});

server.listen(3000);

chromeでアクセスする

ここで、サーバを立ち上げる事ができたので、chromeブラウザで https://localhost:3000へアクセスしてみます。
f:id:kakts:20170809005348p:plain
上述したように、今回はTLS/SSL証明書を自前で用意したため、chromeでwarning画面がでますが、無視して、「詳細設定」→「localhost にアクセスする(安全ではありません)」をクリックすることでアクセスが可能です。

f:id:kakts:20170809005555p:plain

まとめ

これでhttp/2のセキュアなサーバにアクセスできました。 今回は簡単な開設のため、http/2固有の機能を使ったサーバの作り方は解説せず、ここで終わります。
http/2固有の機能を使うことでよりパフォーマンスが向上するため、時間があるときに、http/2RFCをちゃんと読んで仕様を把握していきたいと思います。

参考

qiita.com

d.hatena.ne.jp

babel ES6からES5へのトランスパイル

概要

babel.jsをつかって ES6のシンタックスで書かれたjavascriptファイルをES5のシンタックスにトランスパイルする方法をまとめました。
実務で使ったことなかったので勉強がてらさらっとまとめます。

babel-cliのインストー

babelをコマンドラインで利用するに当たって、babelのコマンドラインクライアントである、npm モジュールのbabel-cliをインストールする必要があります。

www.npmjs.com

開発環境のみで使うので –save-devでpackage.jsonに対してdevDependenciesにモジュールの情報を追記させます。

$ npm install --save-dev babel-cli

今回はサンプルとして今回 hapiというhttpサーバモジュールを使うのでこちらもインストールしておきます

$ npm install --save hapi

.babelrcにプラグイン設定記述

babelでトランスパイルする際に、利用するプラグインを指定する必要があります。
今回はES6(ES2015とも言う)からES5へトランスパイルするため、ES2015 presetを指定します。
babeljs.io

babelコマンドの –presetsオプションでも指定できますが、毎回打つのは面倒なので、 babelの設定を記述するファイルである .babelrcを作成し、json形式で記述します。

.babelrc

{
  "presets": ["es2015"]
}

presets項目に使用するプラグイン名を指定します。

トランスパイル元のjsファイル作成

ここで、トランスパイル元のjsファイルである src/index.jsを作成します。
hapiモジュールを使って簡単なhttpサーバを作ります。
全てES6(ES2015)のシンタックスで記述します。

import Hapi from 'hapi';

const server = new Hapi.Server();
server.connection({
  host: 'localhost',
  port: 8000
});

// Add routing
server.route({
  method: 'GET',
  path: '/hello',
  handler: function(request, reply) {
    console.log('[/hello] requested');
    reply('hello world');
  }
});

server.start();

これを importや constを使わない、ES5形式にトランスパイルさせます。

babelコマンドをつかったトランスパイル

トランスパイルした後のファイルは dist/index.jsに作成させるとします。

さっそくコマンドラインでbabelコマンドを使ってトランスパイルさせます。
babelコマンドの –out-fileオプションをつかって、トランスパイル後のファイルの出力先を指定します。

$ babel src/index.js --out-file dist/index.js

これによって、 dist/index.jsにES5形式にトランスパイルされたjsファイルができあがります。

'use strict';

var _hapi = require('hapi');

var _hapi2 = _interopRequireDefault(_hapi);

function _interopRequireDefault(obj) { return obj && obj.__esModule ? obj : { default: obj }; }

var server = new _hapi2.default.Server();
server.connection({
  host: 'localhost',
  port: 8000
});

// Add routing
server.route({
  method: 'GET',
  path: '/hello',
  handler: function handler(request, reply) {
    console.log('[/hello] requested');
    reply('hello world');
  }
});

server.start();

元のjsファイルで使っていた import, const が使われずにそれぞれ require varを使うようにトランスパイルされているのが確認できます。

babelをつかったトランスパイルの手順は以上となります。 まだ試していませんが、最新のES2017形式のファイルをES5にトランスパイルする場合は ES2017 presetを使えばできます。
babeljs.io